
Monday, October 29, 2012
Week 8 : Absent to Class
Today i'm not very well to go to class. I got fever during my 32 weeks of pregnancy is very tough to handle it for me. Hope will get well soon as soon as possible.
 Sorry Hj Johari, i can't attend to class today.
Monday, October 22, 2012
Week 7 : Video Editing
Video editing class was held at editing studio in our faculty. Class session today was take over by our technician, Mr Aziz who is expert in video editing.
We have introduced to new software in video editing named Avid Express. It's new experience to me in editing video in studio. Normally we just do an editing using Cyberlink Power Director.
Mr Aziz show us how to do an editing. There is some term use during editing :


We have introduced to new software in video editing named Avid Express. It's new experience to me in editing video in studio. Normally we just do an editing using Cyberlink Power Director.
Mr Aziz show us how to do an editing. There is some term use during editing :
- Betacam
- Capture
- Mark in
- Mark out
- insert
- effect
- blend


Monday, October 15, 2012
Week 6 : Video Shooting
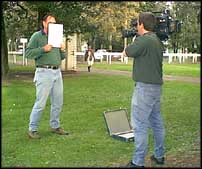
Today class start earlier than normally because we have video shooting for convocation rehearsal at Dewan Dewan Sultan Iskandar. So, our class today officially on air from control room at the back of stage.

We have introduced to the production crew and equipment use in video shooting. In this event use 3 cameras connected to control room. Each camera will appear control by mixer.


Mixer


Display monitor
Monday, October 8, 2012
Week 5 : Lighting
Lighting is very important to produce a brilliant picture or videos. There is 3 situation in lighting :

Type of Studio Light

- Artificial Light
- Natural Light
- Natural Situation (2 hours after sunrise and 2 hours before sunset)
Type of Studio Light
- Main/key light : should be in 45° angle.
- Fill light : eye level.
- Back ground light :
- Accent light : shine the subject from the back to make the subject get away from back ground.
Monday, October 1, 2012
Week 4 : Camera Handling
White Balance Setting
White balance basically means colour balance. It is a function which gives the
camera a reference to "true white" — it tells the camera what
the colour white looks like, so the camera will record it correctly. Since white light is
the sum of all other colours, the camera will then display all colours correctly.
Incorrect white balance shows up as pictures with orange or blue tints, as demonstrated by the following examples:
Most consumer-level camcorders have an "auto-white
balance" feature, and this is how most amateurs operate. The camera performs it's own
white balance without any input from the operator. In fact, very few home-video users are
aware of it's existence. Unfortunately, the auto-white balance is not particularly
reliable and it is usually preferable to perform this function manually.
You will need:
Incorrect white balance shows up as pictures with orange or blue tints, as demonstrated by the following examples:
 Correct colour balance |
 Colour balance too blue |
 Colour balance too yellow |
You will need:
-
A camera with a manual white-balance function. There should be a "white balance" button or switch on your camera.
-
 If your camera has a filter wheel (or if you use add-on filters), make sure you are using the correct filter for the lighting conditions.
-
Point your camera to a pure white subject, so that most of what
you're seeing in the viewfinder is white. Opinions vary on just how much
white needs to be in the frame - but we've found that about 50-80% of
the frame should be fine (Sony recommends 80% of frame width). The
subject should be fairly matte, that is, non-reflective.
-
Set your exposure and focus.
-
Activate the white balance by pressing the button or throwing the
switch. The camera may take a few seconds to complete the operation,
after which you should get a message (or icon) in the viewfinder.
Hopefully this will be telling you that the white balance has succeeded - in this case, the camera will retain it's current colour balance until another white balance is performed.
If the viewfinder message is that the white balance has failed, then you need to find out why. A good camera will give you a clue such as "colour temperature too high" (in which case change filters). Also try opening or closing the iris a little.
Cut Away Shots
This technique called cutaway is a shot that's usually of something other than the
current action. It
could be a different subject (eg. this cat when the main subject is
its owner), a close up of a different part of the subject (eg.
the subject's hands), or just about anything else.
The cutaway is used as a "buffer" between shots (to help the editing process), or to add interest/information.
Here is the good example to show of how cutaway shots work.
The cutaway is used as a "buffer" between shots (to help the editing process), or to add interest/information.
Here is the good example to show of how cutaway shots work.
Task for today
Before end of class, lecturer show us an example video movie made by our senior for this subject tittle "Revenge". Homework for today is, we have to discuss in our group of 3 or 4 to create short movie (about 5 to 10 minutes). For next week we need to prepare movie script. Hmmm what we want to do huh? Give us an ideas...Please! Hope we can do the best for this task.
Subscribe to:
Posts (Atom)