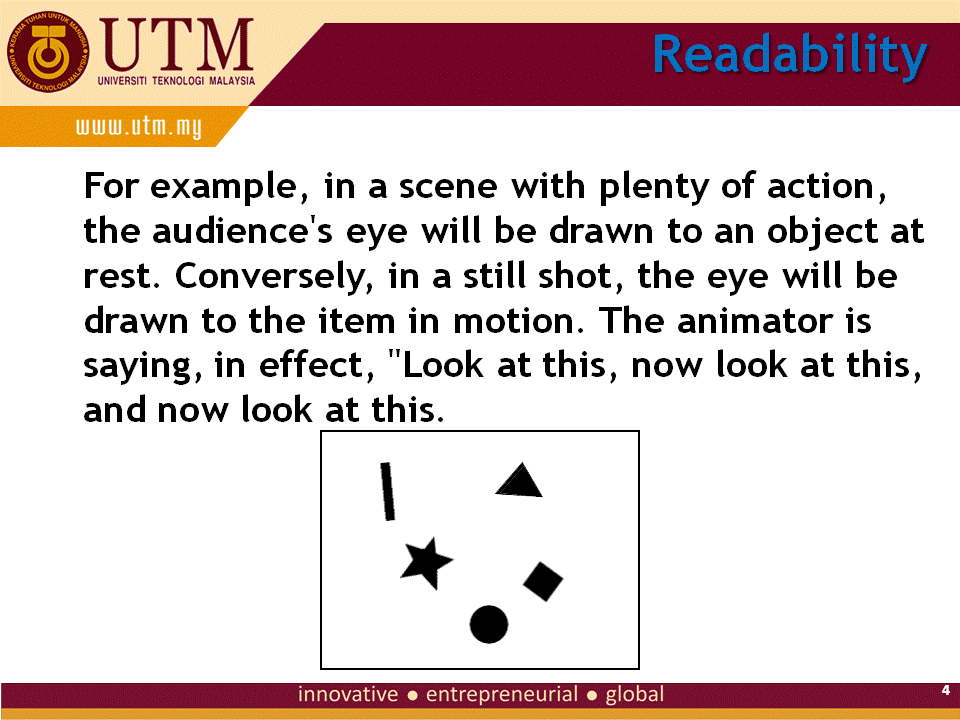
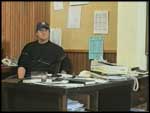
Anyway, this outcome from our group for animation project.
Monday, December 31, 2012
Project Presentation
Today is our final project presentation for video and animation. But i can't join this session cause i'm still in my confinement session at home sweet home. Good luck all my friends... Thank you for my colleague for this project Fadlee, Diyana and Musa.
Anyway, this outcome from our group for animation project.
Anyway, this outcome from our group for animation project.
Monday, December 17, 2012
Week 15 : Last Class
Today is our last session for this subject but sadly i can't attend this class. I just deliver my 4th baby 3 days ago. Sorry Dr J, for this inconvenience.
Thank you friends for information about final exam tips given by Dr Jamal.
8 subjective question -4 in section A (video part) -4 in section B (animation part)
Answer any 3 Q from sect A n 3 Q from sect B Please answer in 2 different booklet.
*The questions are: -in Malay and English -from: slide, discussion and article
How to answer? -1-recall what u have learnt -2-application
-->always relate on WHAT, WHY and HOW
Example of past year question..
1. Give 4 basic animation principles and how the principle help an animator to produce a good quality animation.
-->can draw -->give example
2.jump cut scene/ cut away shot
Monday, December 10, 2012
Week 14 : StoryBoard Elements
Today we start class at 3.00 o'clock. Before start the class, we've disscus about the presentation date for final project video and animation and Dr Jamal was decide the presentation will held on 31 Dec 2012.
This week we start the class with lab activity for animation. Dr Jamal was show us some example of animation and how to create the animation. Here is my lab activity :
Second half of the class, Dr Jamal was explain to us about storyboard for animation.
Storyboard adalah perwakilan secara visual daripada screenplay dan terdiri daripada imej-imej dan nota produksi. Ia mengandungi beberapa siri panel untuk scene atau shot yang telah dikenalpasti pada screenplay yang digambarkan melalui rajah. Tiada standard yang khas dalam membina storyboard tetapi terdapat beberapa tamplet yang boleh diguna pakai untuk membina storyboard.
Ia Biasanya dilakarkan pada board, paper, preprinted paper with guide. Terdapat banyak sifat-sifat storyboard termasuklah dimensi, dimensi akan ditentukan melalui fungsi storyboard contohnya untuk pembangunan konsep atau untuk mempersembahkan konsep pada klien atau sebagai panduan untuk produksi yang sebenar.
Terdapat tiga jenis papan cerita :
From the preliminary interview in which Dr. Paula Messina explained what she does in the field, her Web site, and a review of an existing story, the content -- existing and anticipated -- broke down into:
Nonlinear parts -- Home page with four inside pages. The four parts are the quest (research), a bio (of Messina), the rocks (how they move), and the site of the dancing rocks, Death Valley's Racetrack Playa (its colorful history).
Video -- Anticipate video from the field trip: Messina mapping the rock trails, assembling her gear, the trip to and from the playa.
Audio -- Anticipate audio from the field trip: Messina explaining how she works, what the gear does, and why she does what she does. Maybe what the Racetrack Playa sounds like.
Still photos -- Available from Messina's Web site, and professional photographers, if necessary. Anticipate grabbing still photos from video of wide-angle shots of the playa, rocks and trails, maybe Death Valley National Park rangers.
Graphics -- Existing aerial photo, maps and rock trails.
Text -- History of research, history of the Racetrack Playa from interviews with Messina, other researchers, and the park rangers.
This is a sketch the rough storyboard (click for larger versions):
This week we start the class with lab activity for animation. Dr Jamal was show us some example of animation and how to create the animation. Here is my lab activity :
Second half of the class, Dr Jamal was explain to us about storyboard for animation.
Storyboard adalah perwakilan secara visual daripada screenplay dan terdiri daripada imej-imej dan nota produksi. Ia mengandungi beberapa siri panel untuk scene atau shot yang telah dikenalpasti pada screenplay yang digambarkan melalui rajah. Tiada standard yang khas dalam membina storyboard tetapi terdapat beberapa tamplet yang boleh diguna pakai untuk membina storyboard.
Ia Biasanya dilakarkan pada board, paper, preprinted paper with guide. Terdapat banyak sifat-sifat storyboard termasuklah dimensi, dimensi akan ditentukan melalui fungsi storyboard contohnya untuk pembangunan konsep atau untuk mempersembahkan konsep pada klien atau sebagai panduan untuk produksi yang sebenar.
Terdapat tiga jenis papan cerita :
- Conceptual Storyboard
- Presentation Storyboard
- Production Storyboard
Example - Dancing Rocks Rough Storyboard
Here's a rough storyboard for the "Dancing Rocks" story.From the preliminary interview in which Dr. Paula Messina explained what she does in the field, her Web site, and a review of an existing story, the content -- existing and anticipated -- broke down into:
Nonlinear parts -- Home page with four inside pages. The four parts are the quest (research), a bio (of Messina), the rocks (how they move), and the site of the dancing rocks, Death Valley's Racetrack Playa (its colorful history).
Video -- Anticipate video from the field trip: Messina mapping the rock trails, assembling her gear, the trip to and from the playa.
Audio -- Anticipate audio from the field trip: Messina explaining how she works, what the gear does, and why she does what she does. Maybe what the Racetrack Playa sounds like.
Still photos -- Available from Messina's Web site, and professional photographers, if necessary. Anticipate grabbing still photos from video of wide-angle shots of the playa, rocks and trails, maybe Death Valley National Park rangers.
Graphics -- Existing aerial photo, maps and rock trails.
Text -- History of research, history of the Racetrack Playa from interviews with Messina, other researchers, and the park rangers.
This is a sketch the rough storyboard (click for larger versions):
Monday, December 3, 2012
Week 13 : Animatic
Animatic : storyboard (static) add motion, tiny, sound etc to look nicer. It's also can called dynamic storyboard.
The Dissolving Process in Animation
Another technique in animation we learnt today is dissolve. Dissolving is a
method of transitioning between scenes in live-action film and video
production. Two videos overlap in the timeline; simultaneously, the lead
video's opacity decreases from 100 per cent to zero, while the second
video's opacity increases from zero to 100 per cent. This process is
also used in animation. The dissolve can also be employed to fade
objects and characters from view. There is an example of dissolve.
We also have lab activity in animation to apply several technique such as panning, zoom in, zoom out and also dissolve using black box and another one using another picture just adjust at the alpha properties. There is my lab activity :
Monday, November 26, 2012
Week 12 : No class for this week
Today we got message from Dr Jamal that class for today is cancelled and will be substitute to another time due to he was involved in pre-workshop at our faculty.
We were at the faculty actually when received his sms and we proceed to do our group assignment.
We were at the faculty actually when received his sms and we proceed to do our group assignment.
Monday, November 19, 2012
Week 11 : Principles of Animation
Before semester break, Dr Jamal have give us homework about the principles of animation. Dewi, Fadlee and Che Ku was presented their topic in class today. After that, Dr Jamal discussed the principles with details..
There are 12 basic principles of animation introduced by the Disney animators Ollie Johnston and Frank Thomas in their 1981 book The Illusion of Life: Disney Animation.
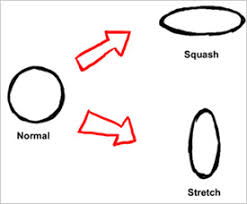
This principles Squash and Stretch is contracting and expanding movement within a shape as it moves through action. Also squash and stretch is useful in animating dialogue and doing facial expressions.


Appealing animation does not mean just being cute and cuddly. All characters have to have appeal whether they are heroic, villainous, comic or cute. Appeal, as you will use it, includes an easy to read design, clear drawing, and personality development that will capture and involve the audience's interest.
There are 12 basic principles of animation introduced by the Disney animators Ollie Johnston and Frank Thomas in their 1981 book The Illusion of Life: Disney Animation.
- SQUASH AND STRETCH
This principles Squash and Stretch is contracting and expanding movement within a shape as it moves through action. Also squash and stretch is useful in animating dialogue and doing facial expressions.
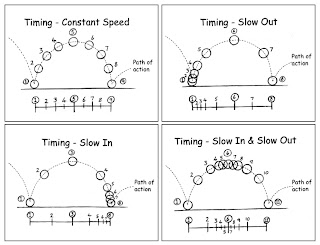
- SLOW-OUT AND SLOW-IN

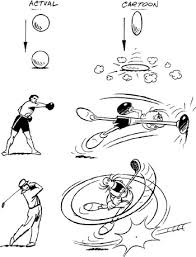
- EXAGGERATION
- FOLLOW THROUGH AND OVERLAPPING ACTION
- ANTICIPATION
- the preparation for the action - this is anticipation
- the action
- the termination of the action
- STAGING
- STRAIGHT AHEAD ACTION AND POSE TO POSE
- ARCS
- SECONDARY ACTION
- TIMING
- SOLID DRAWING
- APPEAL
Appealing animation does not mean just being cute and cuddly. All characters have to have appeal whether they are heroic, villainous, comic or cute. Appeal, as you will use it, includes an easy to read design, clear drawing, and personality development that will capture and involve the audience's interest.
.gif) |
| "My mum told me never to forget my principles" |
Monday, November 12, 2012
Week 10 : Mid Term Break
During mid term break, we have homework to do. We need to choose 1 of 12 topic for Animation Principles from utm e-learning. My topic is "Staging".
There are my presentation slides that i have been prepared for presentation.


There are my presentation slides that i have been prepared for presentation.


Monday, November 5, 2012
Week 9 : Animation Terms
Today is the starting of our second part in this subject which is called "Animation". This part will be lecture by Assoc Prof Dr Jamaludin Harun.
For the introduction, Dr Jamal was told us to flash back how to make an animation using Adobe Flash software. He also remind us that he not going to teach from basic because all of us should be have some experience in this software during our Authoring System class.
For flash back our knowledge in Adobe Flash, Dr give us several terms which is used before.
- Keyframes - allowed to insert an instance
- Tweening - in between of key frames.
- Onion Skinning - creating animated and editing movies to see several frames at once
- Frame by frame - showing a series of frames
- Frame rate - number of frames per second (fps). For computer animation just enough to use 12 - 15 frames per second.
| Onion skinning animation |
Monday, October 29, 2012
Week 8 : Absent to Class
Today i'm not very well to go to class. I got fever during my 32 weeks of pregnancy is very tough to handle it for me. Hope will get well soon as soon as possible.
 Sorry Hj Johari, i can't attend to class today.

Monday, October 22, 2012
Week 7 : Video Editing
Video editing class was held at editing studio in our faculty. Class session today was take over by our technician, Mr Aziz who is expert in video editing.
We have introduced to new software in video editing named Avid Express. It's new experience to me in editing video in studio. Normally we just do an editing using Cyberlink Power Director.
Mr Aziz show us how to do an editing. There is some term use during editing :


We have introduced to new software in video editing named Avid Express. It's new experience to me in editing video in studio. Normally we just do an editing using Cyberlink Power Director.
Mr Aziz show us how to do an editing. There is some term use during editing :
- Betacam
- Capture
- Mark in
- Mark out
- insert
- effect
- blend


Monday, October 15, 2012
Week 6 : Video Shooting
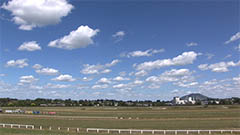
Today class start earlier than normally because we have video shooting for convocation rehearsal at Dewan Dewan Sultan Iskandar. So, our class today officially on air from control room at the back of stage.

We have introduced to the production crew and equipment use in video shooting. In this event use 3 cameras connected to control room. Each camera will appear control by mixer.


Mixer


Display monitor
Monday, October 8, 2012
Week 5 : Lighting
Lighting is very important to produce a brilliant picture or videos. There is 3 situation in lighting :

Type of Studio Light

- Artificial Light
- Natural Light
- Natural Situation (2 hours after sunrise and 2 hours before sunset)
Type of Studio Light
- Main/key light : should be in 45° angle.
- Fill light : eye level.
- Back ground light :
- Accent light : shine the subject from the back to make the subject get away from back ground.
Monday, October 1, 2012
Week 4 : Camera Handling
White Balance Setting
White balance basically means colour balance. It is a function which gives the
camera a reference to "true white" — it tells the camera what
the colour white looks like, so the camera will record it correctly. Since white light is
the sum of all other colours, the camera will then display all colours correctly.
Incorrect white balance shows up as pictures with orange or blue tints, as demonstrated by the following examples:
Most consumer-level camcorders have an "auto-white
balance" feature, and this is how most amateurs operate. The camera performs it's own
white balance without any input from the operator. In fact, very few home-video users are
aware of it's existence. Unfortunately, the auto-white balance is not particularly
reliable and it is usually preferable to perform this function manually.
You will need:
Incorrect white balance shows up as pictures with orange or blue tints, as demonstrated by the following examples:
 Correct colour balance |
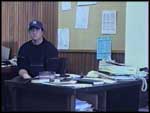 Colour balance too blue |
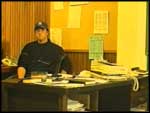 Colour balance too yellow |
You will need:
-
A camera with a manual white-balance function. There should be a "white balance" button or switch on your camera.
-
 If your camera has a filter wheel (or if you use add-on filters), make sure you are using the correct filter for the lighting conditions.
-
Point your camera to a pure white subject, so that most of what
you're seeing in the viewfinder is white. Opinions vary on just how much
white needs to be in the frame - but we've found that about 50-80% of
the frame should be fine (Sony recommends 80% of frame width). The
subject should be fairly matte, that is, non-reflective.
-
Set your exposure and focus.
-
Activate the white balance by pressing the button or throwing the
switch. The camera may take a few seconds to complete the operation,
after which you should get a message (or icon) in the viewfinder.
Hopefully this will be telling you that the white balance has succeeded - in this case, the camera will retain it's current colour balance until another white balance is performed.
If the viewfinder message is that the white balance has failed, then you need to find out why. A good camera will give you a clue such as "colour temperature too high" (in which case change filters). Also try opening or closing the iris a little.
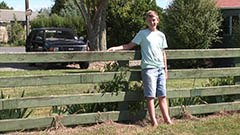
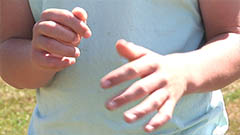
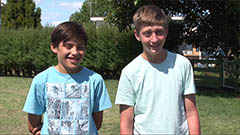
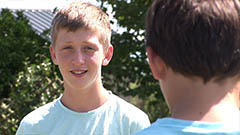
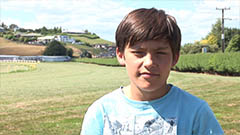
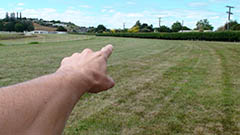
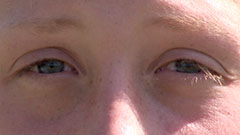
Cut Away Shots
This technique called cutaway is a shot that's usually of something other than the
current action. It
could be a different subject (eg. this cat when the main subject is
its owner), a close up of a different part of the subject (eg.
the subject's hands), or just about anything else.
The cutaway is used as a "buffer" between shots (to help the editing process), or to add interest/information.
Here is the good example to show of how cutaway shots work.
The cutaway is used as a "buffer" between shots (to help the editing process), or to add interest/information.
Here is the good example to show of how cutaway shots work.
Task for today
Before end of class, lecturer show us an example video movie made by our senior for this subject tittle "Revenge". Homework for today is, we have to discuss in our group of 3 or 4 to create short movie (about 5 to 10 minutes). For next week we need to prepare movie script. Hmmm what we want to do huh? Give us an ideas...Please! Hope we can do the best for this task.Tuesday, September 25, 2012
Week 3 : Self Practice Shot
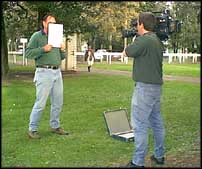
Today me and my group members (Fadlee and Diyana) was borrow a camcoder from faculty. We have explained by our technician, Mr Rosli how to handle the camcoder.
We'll do this task during weekend to practice in video shooting. Need to try many times to get the skills.
We've try to shoot a video as our lecture shown us in class. The video was save in memory stick. I got the problem to transfer it to computer due to the memory stick cannot slot in into laptop slot. Might be need some additional device to fix it.
Monday, September 24, 2012
Week 3 : Process of Video Production
I just joined this class this week. Last week was substitute holiday for Hari Malaysia. This course will handle by Tn Hj Johari Hasan for 1st half of course in video. The 2nd half will meet with Assoc Prof Dr Jamalludin Hj Harun for Animation part.
Today Tn Hj Johari give us lecture in 2nd week topic which is The Process of Video Production as below :
EWS (Extreme Wide Shot)
The view is so far from the subject that he isn't even visible. Often used as an establishing shot.
VWS (Very Wide Shot)
The subject is visible (barely), but the emphasis is still on placing him in his environment.
WS (Wide Shot)
The subject takes up the full frame, or at least as much as comfortably possible.
AKA: long shot, full shot.

MS (Mid Shot)
Shows some part of the subject in more detail while still giving an impression of the whole subject.

MCU (Medium Close Up)
Half way between a MS and a CU.

CU (Close Up)
A certain feature or part of the subject takes up the whole frame.
Cut-In
Shows some (other) part of the subject in detail.
CA (Cutaway)
A shot of something other than the subject.
Two-Shot
A shot of two people, framed similarly to a mid shot.
(OSS) Over-the-Shoulder Shot
Looking from behind a person at the subject.
Noddy Shot
Usually refers to a shot of the interviewer listening and reacting to the subject.
Point-of-View Shot (POV)
Shows a view from the subject's perspective.
Weather Shot
The subject is the weather. Can be used for other purposes, e.g. background for graphics.
The other tutorial of shot types in film making :
Today Tn Hj Johari give us lecture in 2nd week topic which is The Process of Video Production as below :
- Pre-Production (planning, scripting, storyboarding)
- Production (shooting)
- Post-Production (editing, recording sound, audio sweetening)
- PAL short for Phase Alternating Line, is an analogue television colour encoding system used in broadcast television systems in many countries
- SÉCAM (Séquentiel couleur à mémoire, French for "Sequential Color with Memory"), is an analog color television system first used in France.
- NTSC National Television System Committee, is the analog television system that is used in most of North America, parts of South America (except Brazil, Argentina, Uruguay, and French Guiana), Myanmar, South Korea, Taiwan, Japan, the Philippines, and some Pacific island nations and territories
- HDTV High-definition television (HDTV) provides a resolution that is substantially higher than that of standard-definition television
- HDV is a format for recording of high-definition video on DV cassette tape
- CCD is charge-coupled device (CCD) is a device for the movement of electrical charge, usually from within the device to an area where the charge can be manipulated, for example conversion into a digital value.
- CMOS Complementary metal–oxide–semiconductor (CMOS) is a technology for constructing integrated circuits.
- HR Horizontal Resolution is the number of elements, dots or columns from left to right on a printed page, display screen or fixed area such as one inch.
- VR Vertical Resolution which is the number of rows, dots or lines from top to bottom.
- °K (degree Kelvin - unit for light or color temperature)
Equipment and Technology in Video Production

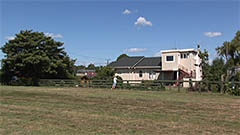
Shot Types
There is several type of shot to know during handling the camcoder to shot the video. This is some tutorial i got from http://www.mediacollege.com/
There is a convention in the video, film and television industries
which assigns names and guidelines to common types of shots, framing and
picture composition. The list below briefly describes the most common
shot types (click the images for more details).
Notes:
- The exact terminology varies between production environments but the basic principles are the same.
- Shots are usually described in relation to a particular subject. In most of the examples below, the subject is the boy.
- See below for more information and related tutorials.
EWS (Extreme Wide Shot)
The view is so far from the subject that he isn't even visible. Often used as an establishing shot.
VWS (Very Wide Shot)
The subject is visible (barely), but the emphasis is still on placing him in his environment.
WS (Wide Shot)
The subject takes up the full frame, or at least as much as comfortably possible.
AKA: long shot, full shot.
MS (Mid Shot)
Shows some part of the subject in more detail while still giving an impression of the whole subject.
MCU (Medium Close Up)
Half way between a MS and a CU.
CU (Close Up)
A certain feature or part of the subject takes up the whole frame.
Cut-In
Shows some (other) part of the subject in detail.
CA (Cutaway)
A shot of something other than the subject.
Two-Shot
A shot of two people, framed similarly to a mid shot.
(OSS) Over-the-Shoulder Shot
Looking from behind a person at the subject.
Noddy Shot
Usually refers to a shot of the interviewer listening and reacting to the subject.
Point-of-View Shot (POV)
Shows a view from the subject's perspective.
Weather Shot
The subject is the weather. Can be used for other purposes, e.g. background for graphics.
The other tutorial of shot types in film making :
Monday, September 17, 2012
Week 2 : Substitute Holiday for Malaysia Day
No class for today due to substitute holiday for Hari Malaysia yesterday.


Subscribe to:
Posts (Atom)